

For this exercise I wanted to change the color of an irregularly shaped element. I also wanted to take an element from one photo and copy it to another photo. Unfortunately the elements were not distinct enough to be selected easily with the magic wand, and I am not patient enough to lasso such selections precisely. I found another way.
To follow along, save the following Saltflat image. (Saltflat and Pines are from my brother's site — he said it's OK) You can drag it to your PSP workspace or save it as a jpg.
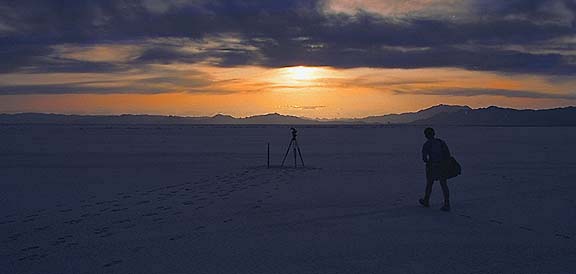
The first thing I wanted to do was change the orange sky.
Click the title bar of the jpg to make the image active.
From the menu bar, pick Colors—>Split Channel—>Split to HSL.
Sometimes the RGB channels provide a better contrast for making selections. They can be opened by clicking Colors—>Split Channel—>Split to RGB. But in this case the HSL split is more effective.
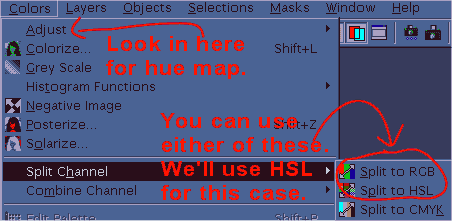
Three new images open up; they are called Lightness, Saturation and Hue. Examine each of these new images. Because Hue provides the most contrast between the clouds and the sky, it's our best choice for Magic Wand selection. Set the Magic Wand tool ![]() options to:
options to:
With the Magic Wand, click the large dark sky area in Hue, then shift-click any smaller dark areas to add to your selection.

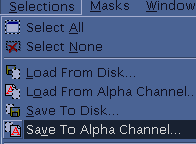
With Hue the active image, choose Selections from the menu bar, then Save to Alpha Channel. The preview window should show your selection. Click OK. Name your selection. Click OK again.
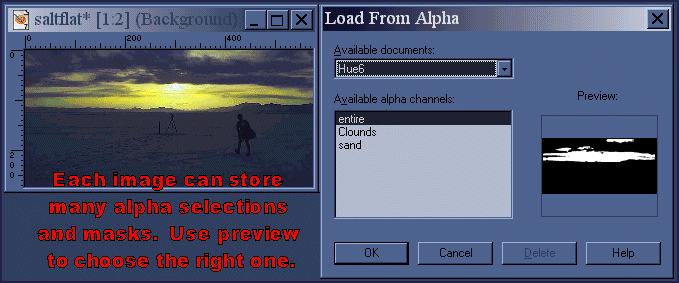
Now make Saltflat the active window. From the menu bar choose Selections—>Load from Alpha Channel—>Choose the selection and click OK.
Here's one way to change the sky color: From the menu bar choose: Colors—>Adjust—>Hue map. Here you can play with the sliders to adjust the colors as you wish or copy my settings below for a yellow sky. The Colors—>Adjust—> menu contains three additional tools — Channel Mixer, Color Balance and Curves — for changing an image's color while maintaining tonal differences. Try these three other tools. You may find one easier to control than the others.
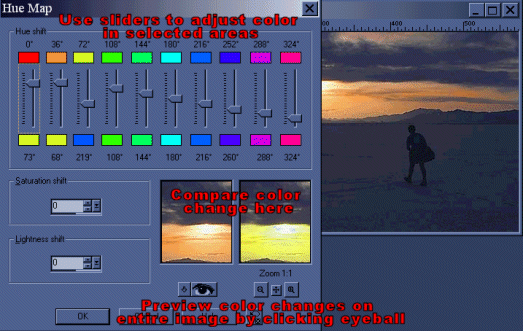
When you've adjusted the sky to your preference choose OK.
That human crossing the flat is an interesting element. Let's play with him. While he is barely noticeable in Hue, he is more distinct in Lightness. With Lightness the active window, choose Color—>Adjust—>Brightness/Contrast. Increase Brightness to 5% and Contrast to 15%. Use the Magic Wand ![]() :
:
Select the human and save to the Alpha Channel. (Selections—>Save to Alpha Channel)
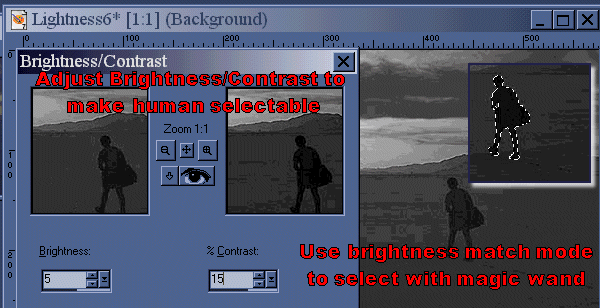
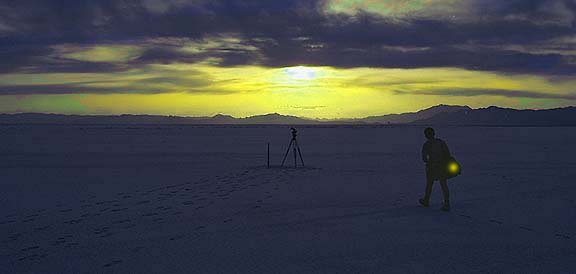
With Saltflat active, choose Selections—>Load From Alpha Channel, and choose the human. He is now the active selection in the photo and can be modified through color adjustments or any PSP effect. I used Illumination—>Sunburst to add some radioactive material to his briefcase.
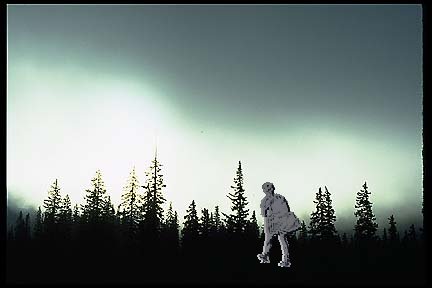
With my human saved to the Alpha Channel, he becomes available to every other open image. I decided to have him entering an ominous pine forest. If you would like to follow along, open a photo of your choice or grab pines here.
With Pines active, create a new layer and make the new layer the active layer by clicking on it in the layers pallet. Then click Selections—>Load from Alpha Channel. Find the human selection and click OK. Use the mover tool ![]() to place him as desired. While he is still selected, you may apply any fill or effect you like.
to place him as desired. While he is still selected, you may apply any fill or effect you like.
Once you have transferred your selections to your photo's alpha channel, you can close your RGB and HSL channels; don't save changes to these channels.
Selections and masks saved to the alpha channel can be saved along with an image in PSP format for future use. They can also be saved independently to your hard drive by choosing: Selections—>Save to Disk, or Masks—>Save to Disk. This could be useful with a shape you use often such as a company logo, or with a shape you meticulously defined such as the outline of a flower to be used as a picture frame. But that's the next tutorial!
| Send mail | MY HOME |